Transplanting, which is often referred to as replanting is a technique in horticulture by which a plant can be moved from its original place of germination to another place. Since its inception in the early 2000s, it has become a widespread phenomenon all across the globe.
Plants can be transplanted for various reasons; Transplanting increases the life span of young plants because in this way they get more time to harden their covering and become resistant to scorching heat. Many a time, either the plant area gets too crowded, or they develop a rot. By using this technique, we can replant the over-grown plants in less cramped areas, and prevent the disease from spreading. This not only saves lots of space but also is a cheap method to re-vegetate any barren area. Transplanting of plants is less laborious than a traditional seedling, and is much more efficient.
Reader Poll: What online courses would interest you?
Transplanting your aerogarden plants is a relatively new phenomenon. However, rest assured it is completely possible- and we will show you how.
Can Aerogarden Plants Be Transplanted?
As mentioned before-Yes. Nearly all Aerogarden plants can be transplanted, and it is not a difficult task at all. You can do this without any prior experience, and it is beyond doubt that this technique will come in handy once you decide to expand on your Aerogarden. However, some things should be kept in mind before carrying out this task.
- Do not transplant your aerogarden plants in winter; especially if there is a danger of frost.
- Every plant requires different water content, moisture, and sunlight. During replanting, make sure to check the requirements of that particular plant and then proceed accordingly.
- Be careful and gentle with the plants; hydroponics plants are not as sturdy as ground plants and therefore are less resistant towards mistreatment.
- It is recommended to transplant the aerogarden plants in flower pots first since the majority of those plants cannot adapt to the harsh outdoor environment.
How To Transplant Aerogarden Plants?
Aerogarden plants can be easily transplanted by following this comprehensive step-by-step guide.
Subscribe to our newsletter!

Required Tools and Items
The following items are necessary for transplanting aerogardens to outdoor gardens.
- Fertilized potting soils
- Aerogarden seed pods
- Garden Flower Pots
- Water
- Scissors
Procedure
Setting Up The Flower Pot
- Take your flower pot, and add some high-quality fertilized soil in it in an adequate amount. Ideally, ¾ parts of the pot should be filled with potting soil.
- Add some perlite in the soil for increased aeration and high water content
- Make sure that the pot is not small, lest the roots should not have sufficient area to propagate.
- Dig a hole in the centre of the flower pot, so that the seed pot/ plant can adjust in there easily.
Removing The Plant From Aerogarden
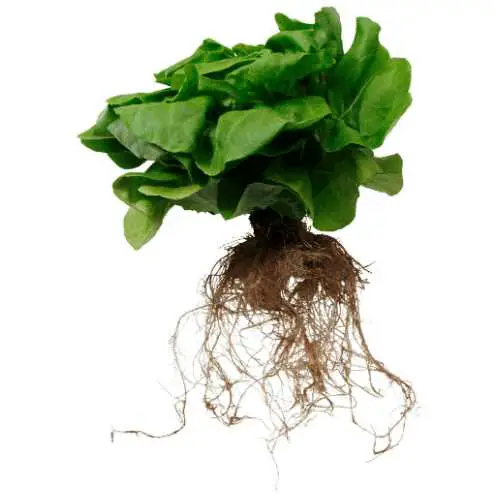
This is a comparatively trickier part where you should be careful. Grow basket is the plastic base at the bottom of an aerogarden. If the plants are young, it should not cause many problems. However, if the plants have grown then chances are that their roots will be entwined, and removing them will not be as easy.
- At first, try wiggling out the plant and that should do. However, if the roots are entwined, and cannot be separated, consider using scissors to separate them. While cutting try to preserve the root structure as much as possible.
- It is recommended to sterilize the scissors before use since the aerogarden plants are not resistant to any bacterial attack.
- If the roots have grown into the grow basket, carefully cut the grow baskets. We advise you to be cautious while cutting, because even a slight miscalculation can cause irreparable loss to the seed pod.
Transplanting The Pod
This is again a step where we recommend you to be as cautious as possible.
- Ensure that the plant is being placed in the pot as straight as possible. If the pod is planted horizontally, or if it is tilted, the chances of growth diminish sharply.
- Plant the seedling as deep as you can. The plant stem should be at least 1 inch into the soil. This will provide the plant with adequate space for propagating its roots, and help in being upright throughout its growth.
Finalizing The Transplant
- Fill the remaining ¼ portion of the pot with fertilized soil. Add water and other nutrients in an adequate amount.
- Do not expose the plants to 14-16 hours of sunlight directly; aerogarden plants are not used to the intense sunlight. Instead, gradually increase the duration of sunlight once they start getting sturdier.
- Once the plants have grown to a certain level, you can transplant them into an outdoor garden.
- Regularly monitor the growth pace of the plants, and make sure that they are getting all the right nutrients in a balanced amount.
What To Do If Transplanted Aerogarden Plants Keep Dying?
It is a sad state of affairs when novice gardeners diligently transplant their aerogarden plants to a new pot, only to find their plants tragically dead within weeks. If you’ve been in a similar situation, go through these tips, and determine where you might have made a mistake.
- Keep soil moist at all times, but prevent overflowing.
- Make sure that the pot has sufficient drainage.
- Refrain from using tight soil; prefer loose and fertilized potting soil.
- Grow the plants at room temperature, and do not expose them to direct sunlight.
Conclusion
Transplanting plants from an aerogarden requires attention and time, but it is completely doable. You should choose the right type of soil and be careful while taking out the pod from the aerogarden. If you execute this technique cautiously, nothing can prevent your plants from blooming.

