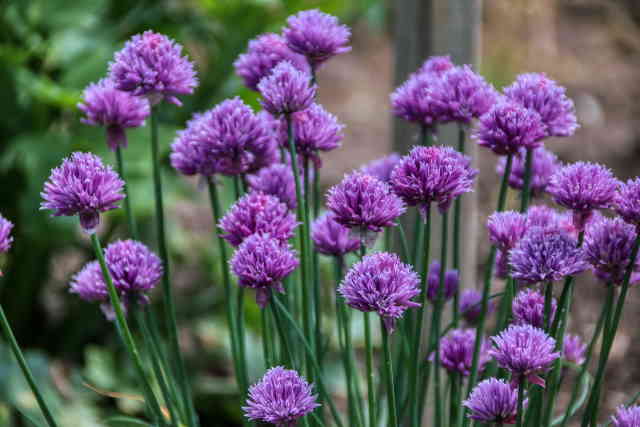
Chives, Allium schoenoprasum, are hardy herbs that make a beautiful and low maintenance addition to the garden. They also come in handy when you want to snip some off and sprinkle it over soup, pasta, or baked potatoes. Besides all the wonderful benefits, chives spread quickly and can extend beyond their boundaries. Sometimes, this invasive nature can be a problem, if you don’t want these chives plants crowding other plants that you’re growing in the area.
Reader Poll: What online courses would interest you?

Do Chives Spread?
Chives are aggressive growers and spread invasively if not controlled. It depends on your requirements. You might have a huge garden, or you’re not growing too many plants and don’t mind the chives patch spreading beyond its limits. In fact, come gardeners may help their chives patch spread for the burst of beautiful purple blooms that come up in spring, or for increasing the supply of fresh herbs to the kitchen. Other gardeners might not approve of this invasive nature and want to control it. By following certain tips, you can train your chives garden to grow the way you want it to.
How Do Chives Spread?
Before understanding how to maintain chives, you need to know how the plant spreads. Similar to most plant species, chives spread when the flowers go to seed and drop seeds to the ground. The seeds, upon getting moisture and nutrients from the soil, pop up as seedlings and turn into new chives plants.
Derived from the above piece of information, we have an effective way of controlling it – deadhead the flowers before they go to seed and bring about a new generation of chives.
Subscribe to our newsletter!
Deadheading Chives
Deadheading chives is important if you don’t want these plants to re-seed and spread all over the place. If given the chance, chives are aggressive re-seeders and have a tendency to appear in places in the garden where you might not want them. Other than spreading, after setting seed, the plant turns woody and loses its flavor. Removing the flowers keeps the plants focused on fresh green growth for a flavorful garnish on your meals.
Deadheading is simply a name given to the removal of flowers before they set seed. Just snip off the flowers as soon as they begin to fade using your hand or pruning shears. Once the flowers turn brown, the seeds will be viable and might fall to the ground, resulting in new plants. Make sure you remove all the flowers before they turn brown.
Removing Unwanted Chives
If your chives patch has already spread beyond its boundary, it’s easy to control it. All you need to do is to get rid of the unwanted chives plants and get your lawn in prim and proper shape again. Snipping or pulling off the green stems won’t work. As long as there’s a bulb under the soil layer, chives will victoriously resurface! Also, pulling the chives plants can cause the bulbets to break and spread into further plants.
Getting rid of the chives bulb will need some digging. Soften the soil around the unwanted chives plants by watering it. Take a trowel and dig around the plant until the bulb comes out easily. Use the foliage in the kitchen or dump the entire plant in the compost bin to become food for the rest of the garden.
Some gardeners also use chemical herbicides to remove chives from places where they don’t want it. According to experts, products with 2,4-D are effective in killing chives but will not damage most varieties of grass. These products are helpful in getting rid of chives that appear in your lawn.
Dividing Chives
The same invasive nature also means propagation is easy if you want to grow chives as a hedge or grow a chives patch elsewhere using the existing chives plants. Many gardeners continue dividing and growing new chives plants using only a couple of chives plants that they sourced initially.
Chives are typically divided in spring or fall. Dividing chives means digging out the plant to extract clumps, each being about 6 inches in diameter, to plant elsewhere. Each clump consists of several bulbets, and each bulbet is an individual plant. Dig around the clump to loosen the roots so it easily breaks free from the rest of the patch.
Once you have a clump of chives out from the patch, give the roots a few jerks against the soil to get rid of the excess dirt. Now work them apart, being careful not to break the roots, into smaller clumps. Continue dividing them until you have 3 to 4 bulbets in each clump.
Replanting Chives Bulbets
Plant these small chives clumps in pre-prepared soil with a 4 inch gap between the clumps. If you want to plant them in a container, 4 small clumps will grow well in an 8-inch wide pot. Chives grow well in fertile, well-drained soil at a location where they can receive at least 6 hours of sunshine each day.
Work in a light dose of balanced fertilizer into the soil where you plan on growing the new chives patch. With consistent watering, the new chives plants will give a fast flush of green growth and bunch up a little into a nice, thick patch before the cold weather sets in.
Conclusion
Now that you know chives spread easily, feel free to have them in your garden but keep a check on their boundaries. Follow all the tips to control chives and a neat and tidy chives patch that supplies fresh herbs to the kitchen every time you want to cook something special.

